Bootstrap Checkbox Switch
Overview
In some cases the elementary things might get pretty essential-- specifically when you come to need them. For instance just how do your website visitors interact with the webpages you create claiming a simple Boolean act-- just yes or no regarding a number of the thoughts you need to ask, exactly how they do consent to the conditions or else line up a handful of the attainable preferences they might possess. We commonly get past this without paying much of an interest to the component accountable for these sorts of activities still, the Bootstrap Checkbox Field is actually a pretty significant element-- one our forms can not in fact do without.
Located in the most recent fourth version of the Bootstrap system we are delivered with the
.form-check.form-check-label<div>.form-check.form-check-label<label><input>.form-check-inputEfficient ways to work with the Bootstrap checkbox:
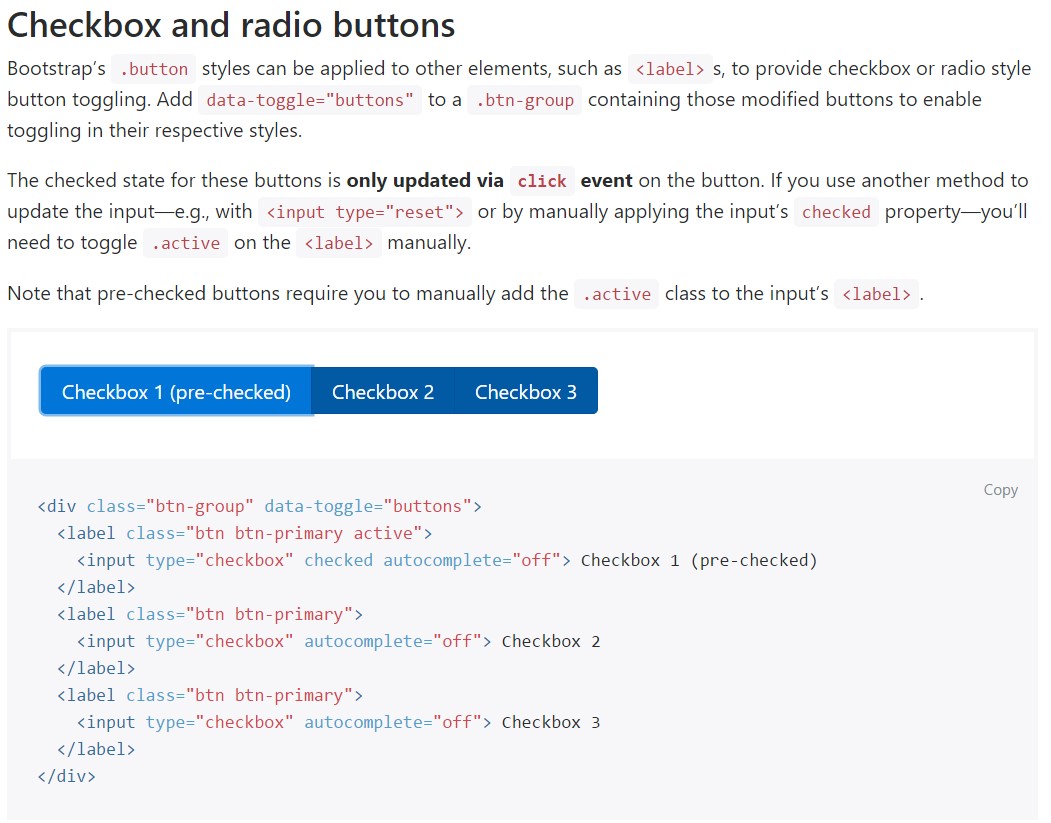
The examined condition for these kinds of buttons is only upgraded through click event on the button. If you use one more procedure to update the input-- e.g., with
<input type="reset">.active<label>
<div class="btn-group" data-toggle="buttons">
  <label class="btn btn-primary active">
    <input type="checkbox" checked autocomplete="off"> Checkbox 1 (pre-checked)
  </label>
  <label class="btn btn-primary">
    <input type="checkbox" autocomplete="off"> Checkbox 2
  </label>
  <label class="btn btn-primary">
    <input type="checkbox" autocomplete="off"> Checkbox 3
  </label>
</div>
From time to time we want the checkboxes to arrive within our forms without the customer actually can have any kind of practice clicking on them-- that is actually where exactly the disabled option comes in.
Just to disable appropriately a checkbox in Bootstrap 4 applying the standard HTML attribute
disabledIf you like the idea and indeed desire to accomplish this you should certainly appoint the
.disabled.form-checkYet another example
Any time you are utilizing checkboxes, wrap them in a
<label>.custom-control.custom-checkboxOperate
.custom-control-input<input>In addition employ two
<span>.custom-control-indicator.custom-control-description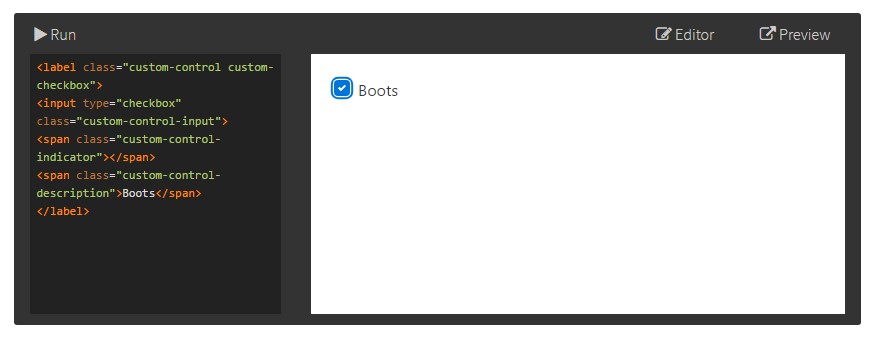
<label class="custom-control custom-checkbox">
<input type="checkbox" class="custom-control-input">
<span class="custom-control-indicator"></span>
<span class="custom-control-description">Boots</span>
</label>
Bootstrap Checkbox Style forms
Default checkboxes and radios are improved upon with the aid of
.form-checkThe disabled class is going to also make lighter the text message color tone to help specify the input's state.
A fresh element for the Bootstrap version 4 system is the arrival of the so called custom form elements. These are the same elements we are familiar with inside functionality but designated even more eye-catching and also in the Bootstrap approach. By using them you may add amazing taste as well as style to your content by simply just assigning a few extra classes to the commands you include in your forms.
To apply custom checkboxes wrap them within a
<label>.custom-control.custom-checkbox<input>.custom-control-input<span>.custom-control-indicator.custom-control-descriptionConclusions
That's essentially all you ought to execute in order to set a checkbox feature in your Bootstrap 4 powered website page and add a number of custom-made flavor to it incorporating it a quality appearances. Right now all you have to do is repeat the practice unless you have actually checked all the checkboxes desired are currently on the web page.
Look at a number of online video short training relating to Bootstrap checkbox
Related topics:
Bootstrap checkbox formal documents
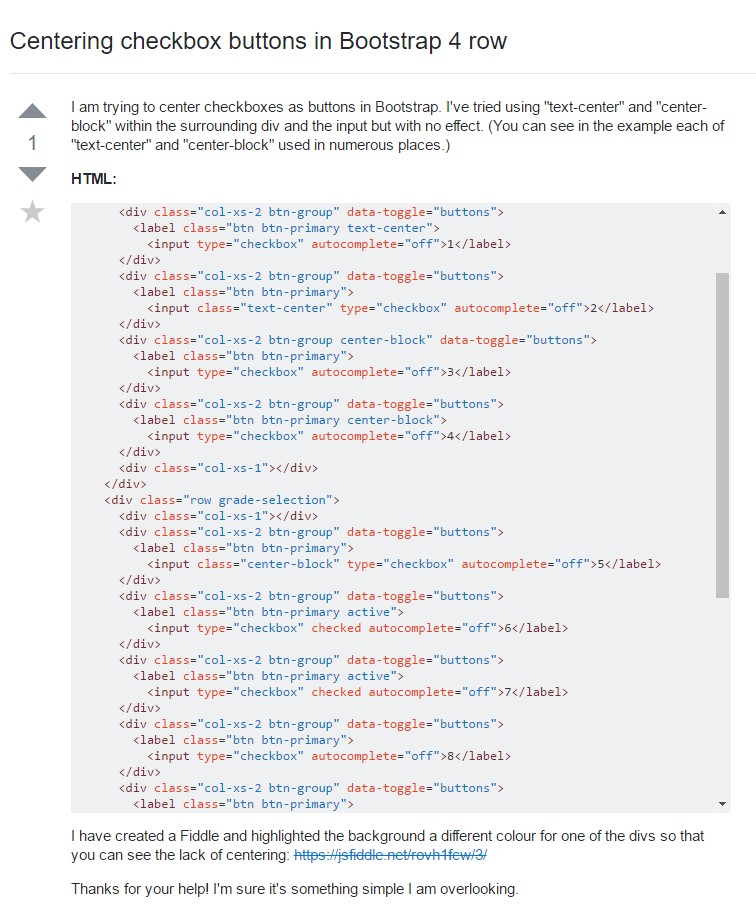
Centering checkbox buttons in Bootstrap 4 row
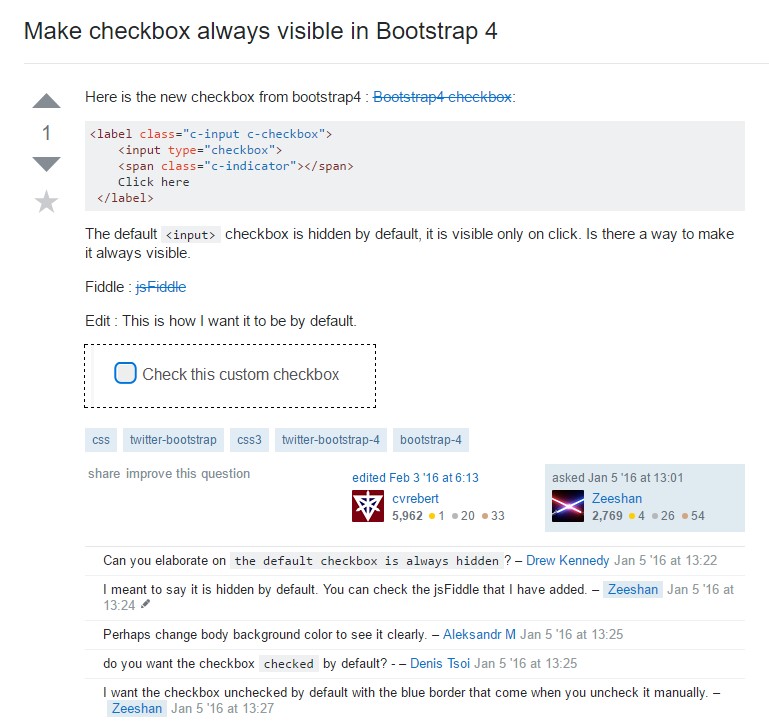
Make checkbox always visible in Bootstrap 4